In many organizations, creating standardized documents populated with up-to-date data can be both time-consuming and error-prone. By leveraging Power Automate to pull information directly from a SharePoint list and inject it into a Word template, you can eliminate manual copy-and-paste steps, ensure consistency, and accelerate your document-generation process. In this article, we’ll walk through how to build a flow that retrieves list items, maps fields to placeholders in a Word template, and outputs a fully formatted document—seamlessly bridging SharePoint data with professional Word reports.
Preparation:
For demonstration purpose, I only add one Text field and Image in the word template.
- Name=Title, Type= Plain Text Content Control, Title=mytitle.
- Name=Image, Type=Picture Content Control, Title=mypic.
And in SharePoint, If List has more image type columns, additional loop in the flow will make it work. I only add one column as Image type.
There are two main approaches for populate word template from List.
- Use ‘Send an HTTP request to SharePoint’.
- Use ‘Get Item’.
I will try the first one in this article.
1. Add a ‘Manually trigger a flow’.
It can also be a When an Item created.
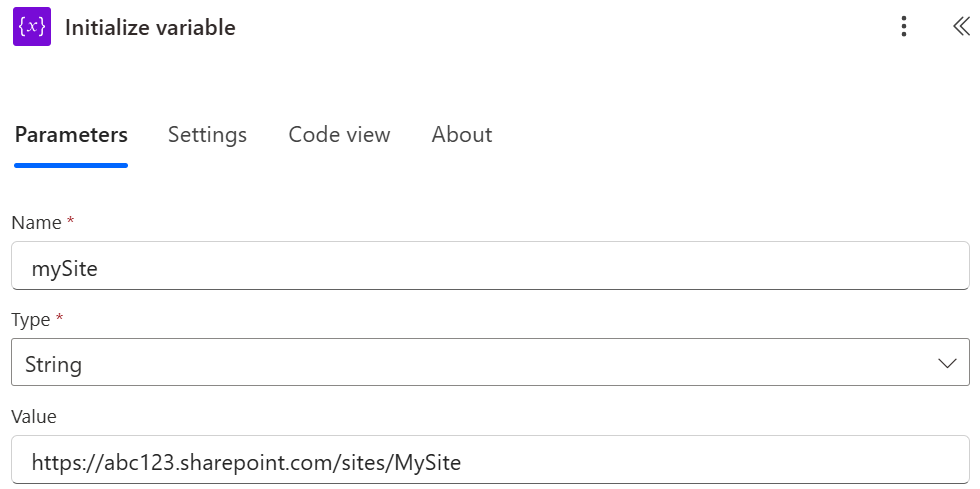
2. Initialize variable for the SharePoint site (Optional)
Initialize a variable to store the site or use the site from dropdown list directly.
Replace the value with your SharePoint site.
3. Add ‘Send an HTTP request to SharePoint’.
Site Address=mySite variable, use your own site.
Method: Get
Uri:
_api/web/lists/getbytitle('test/t')/items?$select=ID,Title,AttachmentFiles&$expand=AttachmentFiles
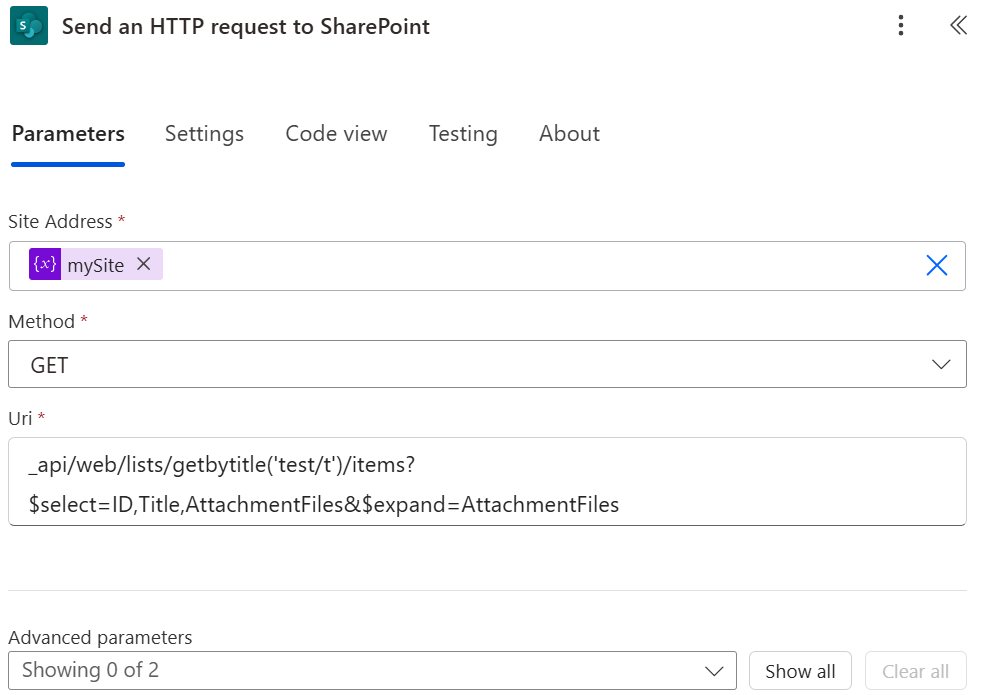
Break down the formula:
_api/web/lists/getbytitle(’test/t’)/items
- This targets the SharePoint REST endpoint for list items.
- getbytitle(’test/t’) means “find the list whose Title is exactly test/t.”
- /items means “return all items from that list.”
$select=ID,Title,AttachmentFiles
- By default, SharePoint will return every field in each list item.
- With $select you can limit the response to just the fields you care about—in this case:
- ID (the list item’s unique identifier),
- Title (whatever text is stored in that column),
- AttachmentFiles (a navigation property that points to any file attachments on each item).
$expand=AttachmentFiles
In SharePoint’s REST API, fields like AttachmentFiles are not simple text or numbers; they’re “navigation properties” (collections of files).
If you simply did $select=AttachmentFiles without $expand, you’d get back only a URI reference or metadata stub to the attachments rather than the actual file details.
By adding $expand=AttachmentFiles, you tell SharePoint:
“When you return each list item, also go fetch the full AttachmentFiles collection for me, so I can see the file names, URLs, etc., right inside the same JSON response.”
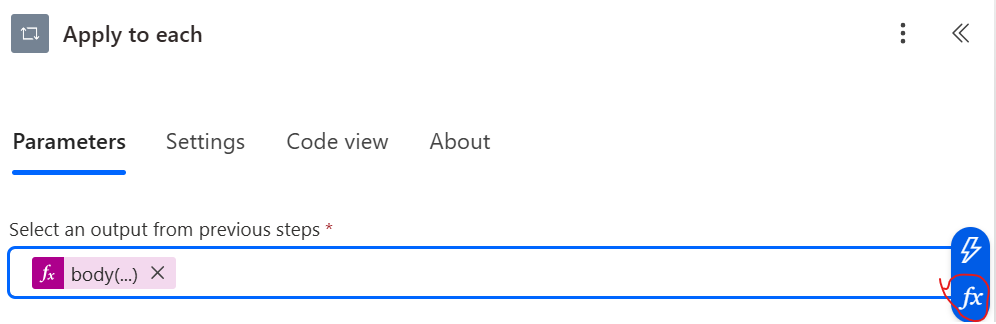
4. Add ‘Apply to Each’
Click fx , add formula and Click Add.
body('Send_an_HTTP_request_to_SharePoint')?['d']?['results']
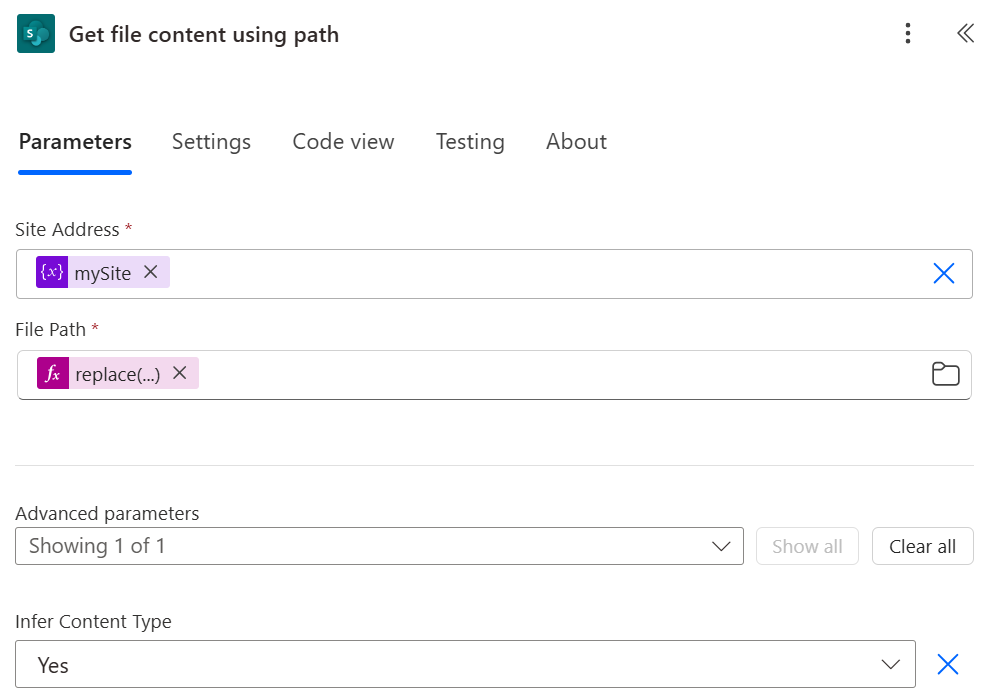
5. Add ‘Get file content using path’
This is mainly for the Image.
Site Address: mySite variable.
File Path:
replace(
  first(items('Apply_to_each')?['AttachmentFiles']?['results'])?['ServerRelativeUrl'],
  '/sites/MySite',''
        )
Break down a little bit of the formula:
Grabs the first attachment for the current item in the loop (since I only has one image type column),
Reads its full ServerRelativeUrl (which includes /sites/MySite), and
Removes the /sites/MySite prefix, leaving it with a cleaner, site‐relative path like for example /Lists/MyList/Attachments/123/Plan.docx.
See below:
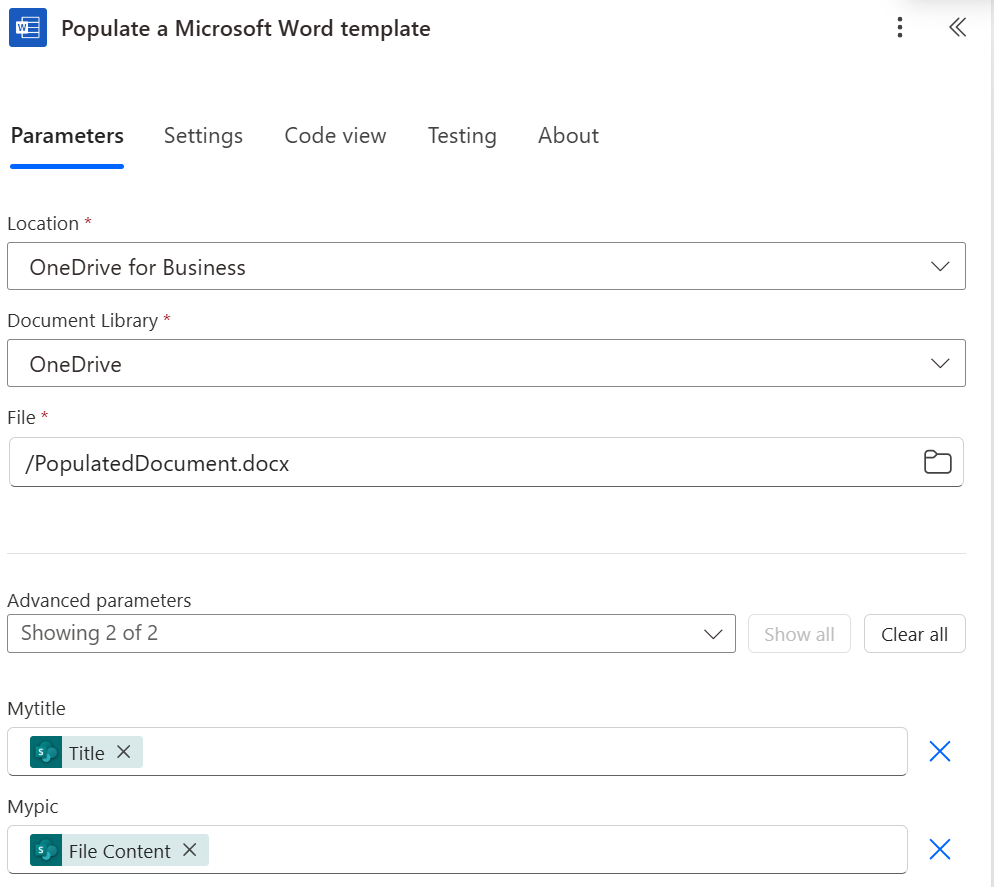
6. Add ‘Populate a Microsoft Word template’.
Location: OneDrive for Business , you can use SharePoint Library as well.
Document Library: OneDrive
File: /PolulatedDocument.docx. You can choose the file from the Folder on the right.
Mytitle: items('Apply_to_each')?['Title']. Click fx, and type formula , and add.
Mypic: body('Get_file_content_using_path'). Click ⚡ and choose it (see below).
You may have different elements from your word template.
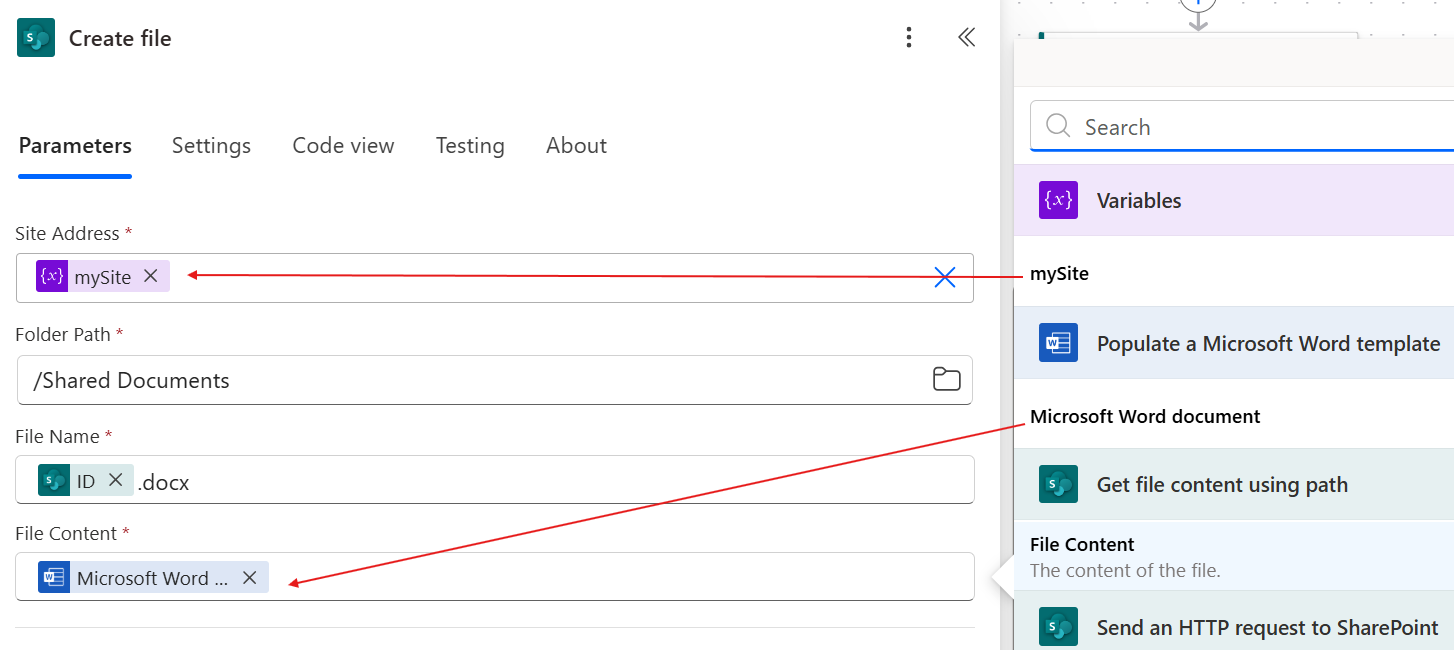
7. Add ‘Create file’.
Site: mySite from the variable.
Folder Path: /Shared Documents. I choose the default Documents from ‘MySite’.
File Name: {items('Apply_to_each')?['ID']}.docx. I use the ID for the word file name.
File Content: body('Populate_a_Microsoft_Word_template'), click ⚡,you will see it.
See below:
You can also add more steps, for example send the word file as attachment.
In closing, automating the population of a Word template from a SharePoint list with Power Automate not only saves time but also reduces errors by ensuring your documents always use the latest data. Once set up, the flow runs hands-free—letting you focus on more strategic work. Give it a try in your next project to streamline document generation and keep your team aligned.